Planning the menu is one of the most exciting parts of hosting a baby shower! Choosing the right mix of sweet and savory bites helps create a welcoming atmosphere and keeps guests happy throughout the celebration.
Start with easy finger foods like mini sandwiches, sliders, fruit skewers, meatballs and cheese platters. These are simple to serve and perfect for mingling. For something warm, consider quiches, pasta cups, or savory pastries. If you’re hosting a brunch shower, add pancakes, muffins, yogurt parfaits, and fresh juices.
No baby shower is complete without sweets! Cupcakes, cookies, cake pops, and a themed cake make the dessert table a highlight. Don’t forget drinks — mocktails, lemonade, iced tea, or a hot chocolate station for cozy gatherings.
Appetizers – Small Bites to Start the Party
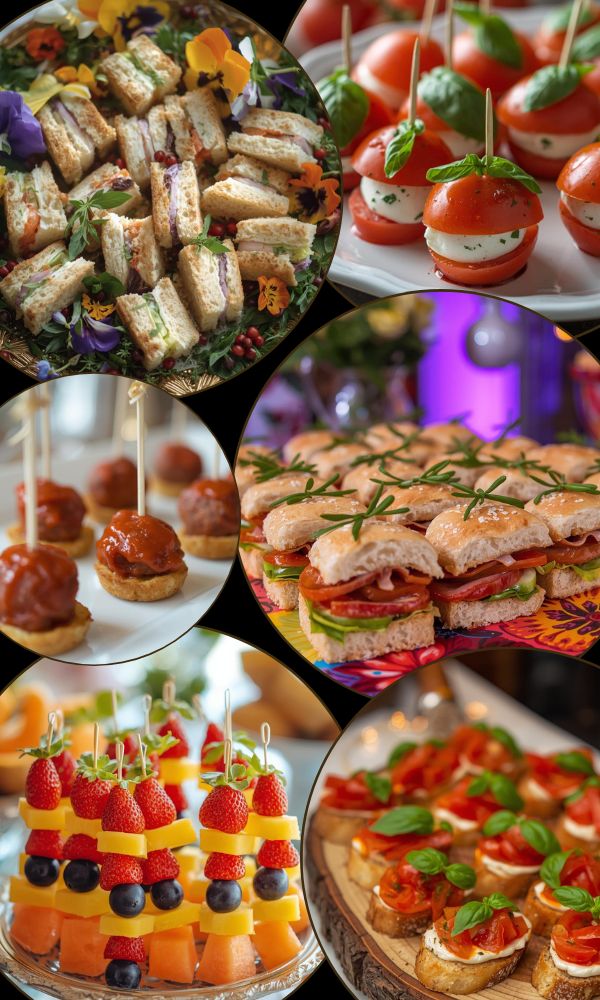
Mini Sandwiches – Cut into cute shapes or small triangles.
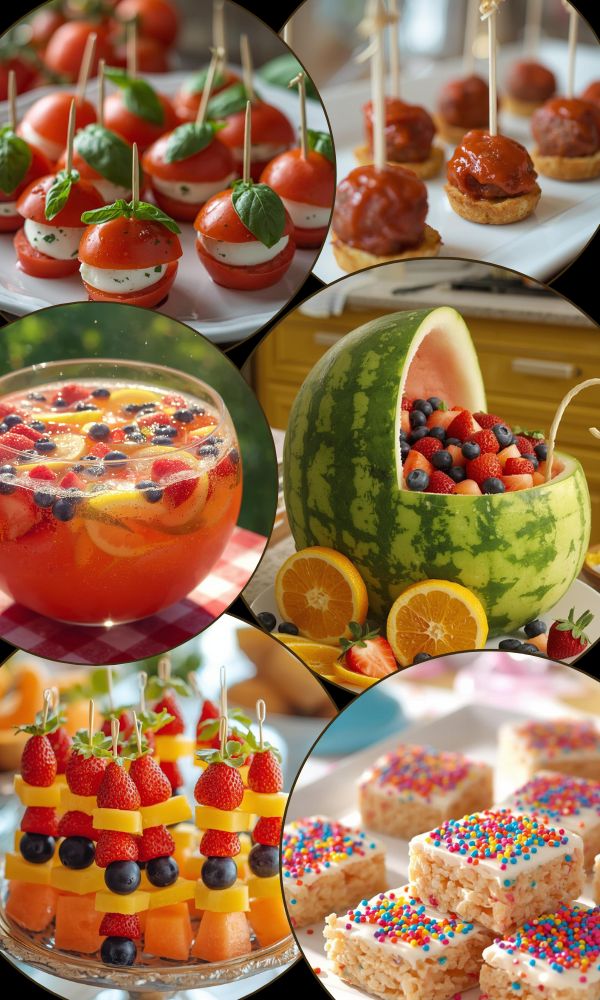
Caprese Skewers – Tomato, mozzarella, and basil on toothpicks.
Deviled Eggs – A classic party favorite.
Fruit Skewers – Use strawberries, grapes, and melon.
Mini Quiches – Easy to make or buy frozen and heat up.
Veggie Cups with Ranch Dip – Put cut veggies in plastic cups.
Bruschetta – Toasted bread with tomatoes and basil.
Cheese Cubes and Crackers – Simple but crowd-pleasing.
Stuffed Mini Peppers – Fill with cream cheese or hummus.
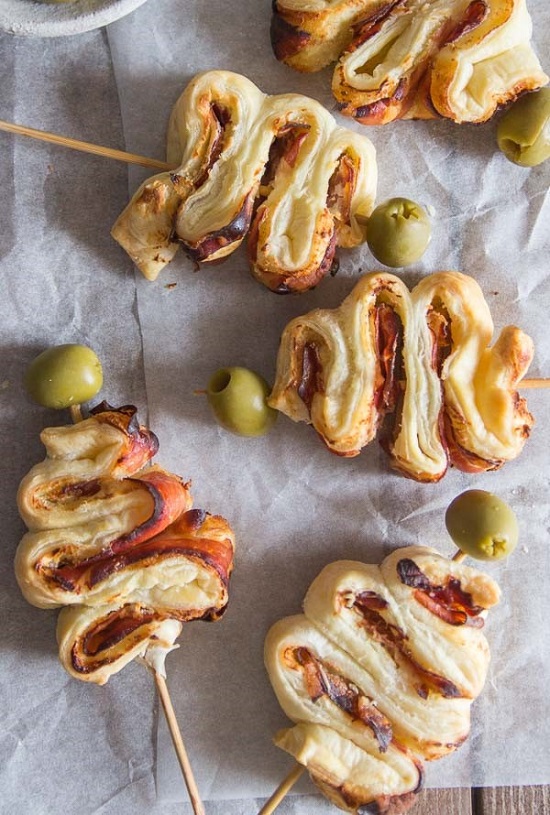
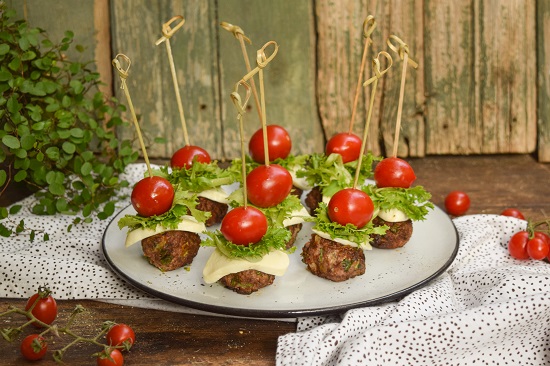
Meatballs on Toothpicks – Serve in a sweet or spicy sauce.
Main Dishes – Easy & Filling Foods
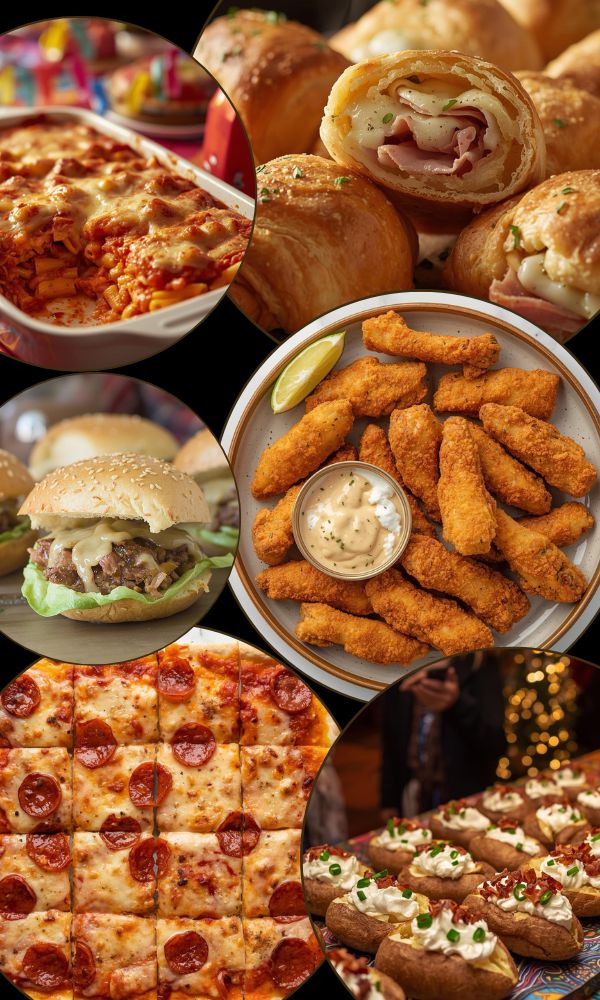
Mini Sliders – Cheeseburger or chicken sliders.
Baked Ziti or Lasagna – Great for large groups.
Pasta Salad – Easy to prepare ahead of time.
Taco Bar – Let guests build their own tacos.
Baked Potatoes – Create a potato bar with toppings.
Mini Pita Pockets – Filled with chicken salad or veggies.
Pulled Pork Sliders – Affordable and full of flavor.
Pizza Squares – Cut a pizza into small pieces.
Chicken Tenders – A hit with adults and kids.
Stuffed Crescent Rolls – Filled with ham, cheese, or cream cheese and herbs.
Side Dishes – Fun Add-Ons for the Table
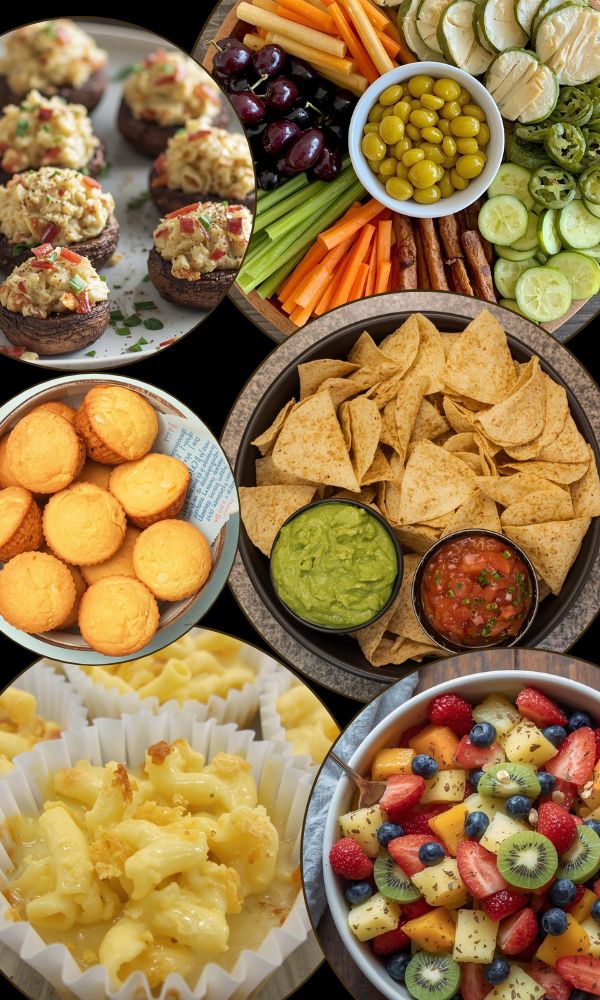
Chips & Salsa or Guacamole – Perfect for snacking.
Macaroni and Cheese Cups – Serve in muffin cups.
Coleslaw – Crunchy, colorful, and budget-friendly.
Garlic Breadsticks – Soft and warm—great with pasta.
Mini Cornbread Muffins – Sweet or savory options.
Pickle and Olive Tray – Easy to prep and adds variety.
Cucumber Sandwiches – Light and elegant.
Sweet Potato Fries – Serve in paper cones.
Fruit Salad – Use seasonal fruits for fresh flavor.
Mini Stuffed Mushrooms – Delicious and bite-sized.
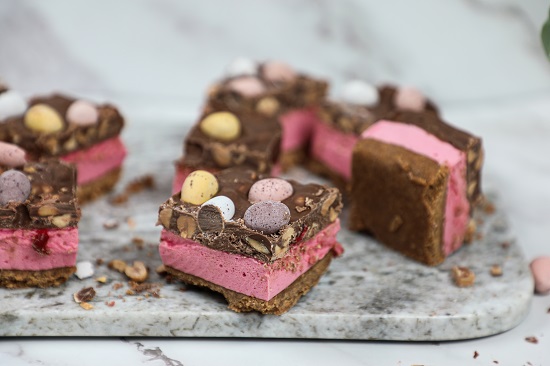
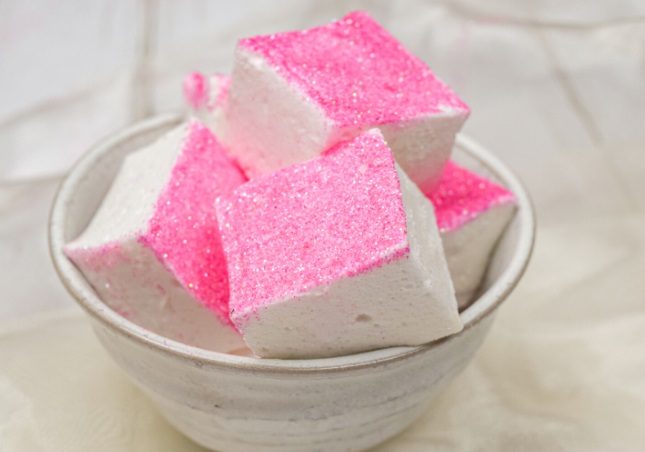
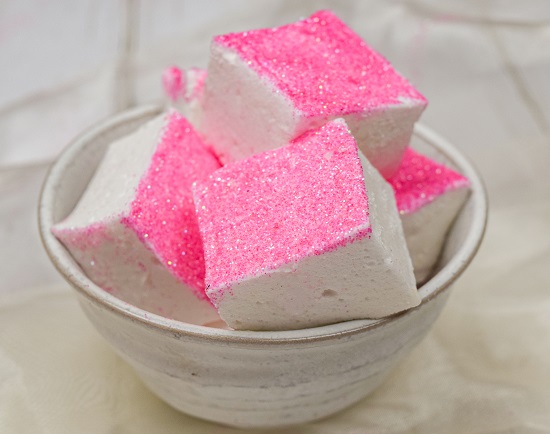
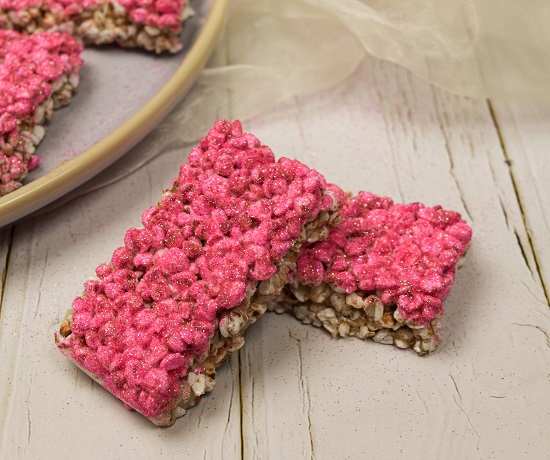
Desserts – The Sweet Part Everyone Loves!
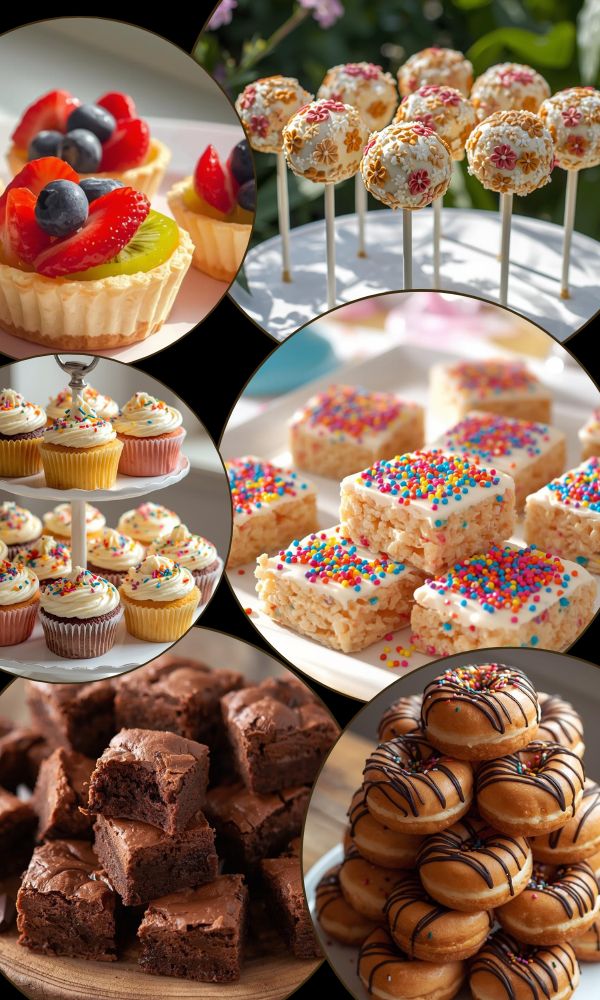
Cupcakes – Decorate to match the baby shower theme.
Sugar Cookies – Cut into baby-themed shapes like bottles or onesies.
Mini Cheesecakes – Serve in cupcake liners.
Brownie Bites – Cut into small squares or use a mini muffin pan.
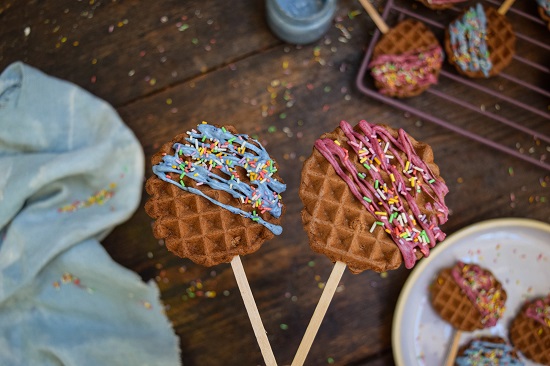
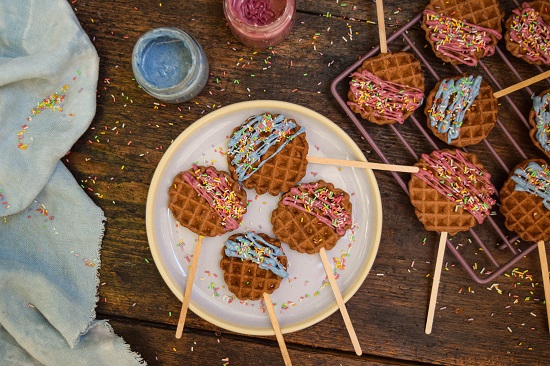
Cake Pops – Cute and mess-free!
Donut Tower – Stack mini donuts like a cake.
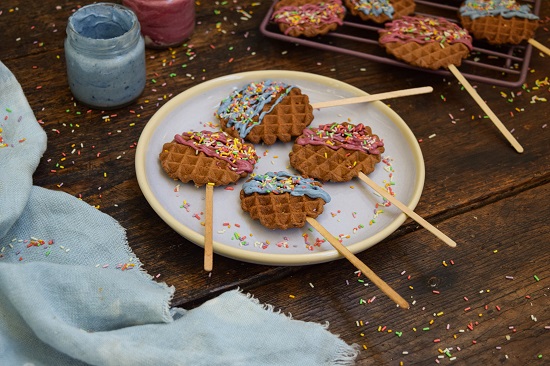
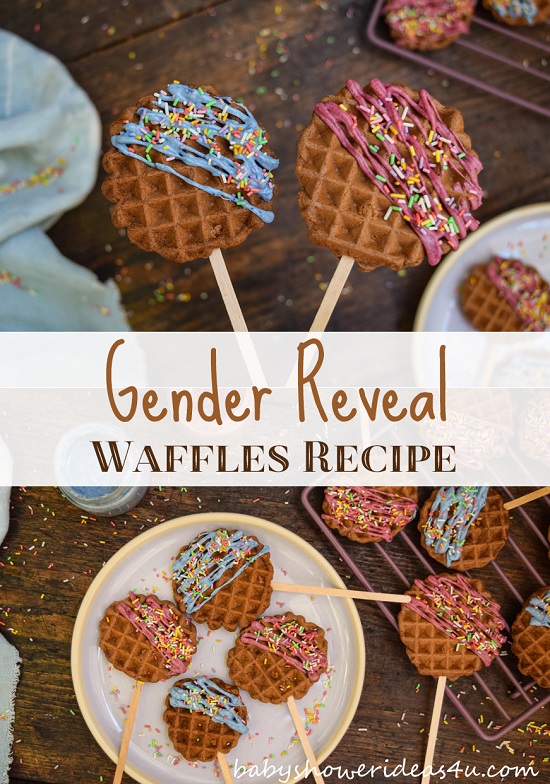
Rice Krispie Treats – Add colored sprinkles to match the theme.
Jello Cups – Layered in pink, blue, or pastel colors.
Mini Fruit Tarts – Beautiful and bite-sized.
Chocolate-Covered Strawberries – Dip in pink, blue, or white chocolate.
Drinks – Keep Guests Refreshed
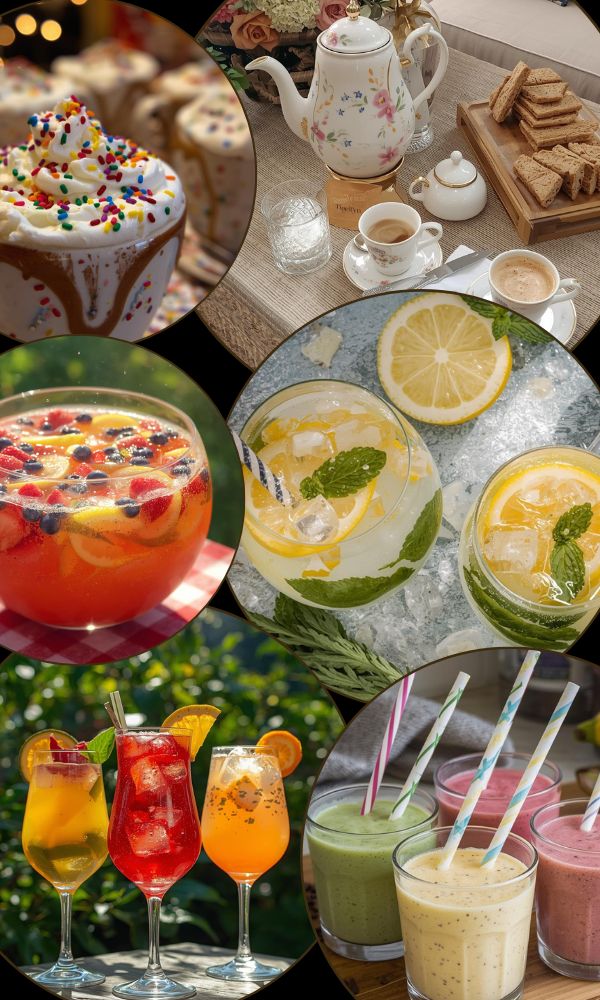
Fruit-Infused Water – Add lemon, mint, or cucumber.
Sparkling Lemonade – Sweet and fizzy.
Iced Tea (Sweet or Unsweetened) – Great for warm weather.
Mocktails – Non-alcoholic drinks using juice and soda.
Hot Chocolate Bar – Great for winter baby showers.
Milk & Cookies Station – Offer flavored milk and mini cookies.
Punch Bowl – Mix fruit juice and lemon-lime soda for a bubbly treat.
Smoothie Shooters – Serve in small cups with straws.
Coffee & Tea Station – Include sugar, honey, and creamers.
Tips for Serving Food at Baby Showers
- Use tiered trays and cute signs to make simple food look fancy.
- Label dishes (especially if there are options for allergies or dietary needs).
- Provide small plates so guests can easily sample everything.
- Offer both sweet and savory options to balance the menu.
- Use color-matching napkins and tableware to tie into your baby shower theme.